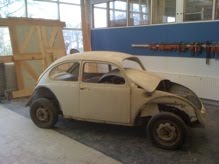

 and that was already repaired....
 looks worse then it is, just needs 3 little plates
 still no idea on how I want it
 another before pic....
 and the after pic. some rustprimer to make it look a little better...
 hmmm, this is a nice view too. maybe a transparent dash...?
 new glasses, protectsheet are still on
 the cutting part is easy....
 and some real cool hinges on top of the spare, i"m going to fit somewhere...
 Off course I cut to much, so I needed to weld in little corners. Doh!
 other side too, and the optima does not fit in the wheelwell leftover....
 Cleaned up a little too.
 As I look at the picture I start to wonder why I didn't replace the entire piece in one go. In the front you can see the old part
 So why do you think I don't want the brakefluidcontainer there anymore...?
 Sprayed some rustprimer on the little welds...

 Yeah, I know it's kind of small. But it's a race radiator so it must be really good....
 6 bolts and it's out
 amazing how much time drilling 12 holes takes
 here's the little ridge, lots of little cuts to bend it
 here is the new front part and the ridge
 and the front clammed on again, it fits
 and from the back. welds look bad and rusty. maybe it's the flash
 and one happy friend with new shinny bike.
 Yup, it's cut.
 The extra lip looks wierd but I still need to cut that.
 soooo... how am I going to get this to bare metal....
 321 and off with the front.
 I promise, I did not touch the well in anyway....
 I made a little mistake on the mill which I had to weld up and filling the holes didn't go perfectly too. So it al looks a little bit ruff but it should work just fine....
 Here's the sump on the engine. To bad the cooling fins on the sump are going the wrong way.... Not sure what I'm going to do about that.
 And under the engine. Still sticks out a fair bit but it's about 5 cm less than the original. Hey, is that the relocated fuel pressure regulator with it's nifty bracket and my new multi rib belt....
 Anyway, I'm very busy at the moment with drawing stuff butt I just had to put this thing together and fit it on my engine to see how it looks. At this moment you might think I'm very happy with this thing and I am..... but. The thing is a piece of crap. Sold as stainless steel, the flanges are ordinary steel. The bends are horribly put together and some welds aren't even finished. If I would have bought this thing to put it on my car just like that I would have send it back without a second thought. But I am not going to put it on my car like that. I'm going to cut it up and re-weld it.
 Why you ask? Well, as you can see on the last picture the thing sticks way out (or in this case up, because the engine is upside down) and on a subaru that wouldn't be a problem but on my bug it is. The entire manifold has to be as low as the lowest pipe in the up side down pic. Also I want the pipes to be shorter so I'm going to wrap the pipes the other way around. (I'll make a photoshop soon to give you an idea) And headers like that just don't exist...or at least not for little money. :D So I bought this header just for the bends (like I said, this is cheaper then buying stainless bends and weld it myself) I'll buy a flange for the turbo from stainless (it comes with a downpipe flange that I need) so in the end just the head flanges are steel which I'm not happy with. The rest is ok.
 So next up is buying/making a shortened oil pan and buying a tig welder (I'm so good in giving myself excuses to buy machinery) so I can rebuild the headers. I already know it's going to be a drama but.... You can't make an omelet without breaking some eggs or some wise remark like that.


 To give you an idea on how big they are.... :D
 Left how it was and right how it should be....
 Some nice stuff to put on the engine, but off course there is something else to do first. (making money that is... :D)
 Here are the fuel rails for my top feeds.
 Bolted on the manifold with some really wierd bosses I am not going to show....
 ...and bolted to the engine. Looking good. This is another one of those "we'll see if it works" projects so let's hope these really are 440cc injectors and the rails are not going to leek. But at least I made them so that I can switch real easy to other injectors....
 While reading on how to make fuel rails I 'discovered' catch cans. When I pulled my engine apart I was really unhappy with al the dirty oil in the turbo and when I read that a catch can can catch that oil I thought I needed one. Or two actually. Of course you can buy them but I think they are kind of expensive for what they are, so I decided to build my own. A catch can is a very simple device, so I thought that making 2 of them would be quick and easy.... Well, I was wrong. It took me 6 freakin' days to build them. No, they didn't turn out to be complicated and it didn't take me hours and hours, it just didn't go smoothly. The 2 holes for the bracket for instants took (the machine) 4 hours to drill. Going to 7 different shops all across town to get the little fittings and then to find out I bought the wrong ones just after the shop closed, didn't help either. Well I can go on like that but I wont. I still need to finish the fuel rail, coolant tank and swirl tank. So I'll just lie to myself and say it all went super smoothly.... :D